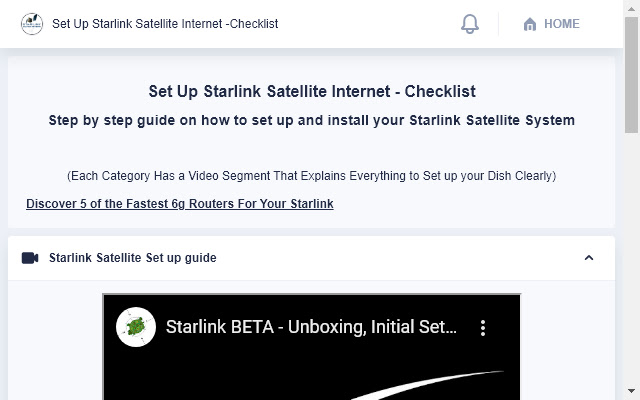
Step by step installation guide for Setting up Starlink Satellite System
We cover everything from the unboxing of your new dish system and all the different mounting options you could need to get you new SpaceX satellite system up and running fast , as well some trouble shooting for the most common issues
Set Up Starlink Satellite Internet -Checklist
Opening the Box for the First Time - Quick Over View
The getting started information just basically tells you a quick overview of the set up process
Point it kind of towards the sky
Plug it into the power injector
Plug in the wi-fi internal part to Modem
Load up the App and see where we go for here
LOL Time To Get Serious
Starlink Satellite Set Up - What Included in the box
Lets dive in and check put all you get with you new Starlink Sateliite
- Tripod Stand Made of Sturdy Aluminum - Three 3/8 Mounting Holes to Secure The Base ( Washers Needed )
Locking Clip On Tripod Base To Clip in Dish - slide the dish into holes and align the hole to lock dish in place
Everything Comes Prewired - All set up for you right out of the box so No wiring needed just set up and plug in
6ft Black Power Supply Cord - Has Regular Computer Plug End Adapter - to plug power supply box in to wall receptacle
100 fTOutdoor Rated Ethernet Cable To Hook Dish To Your Router - For data and power to and from you dish
Starlink Router - cast aluminum with extra Ethernet port to be able to hard wire you Computer to the modem
Short White 6.5ft Ethernet Cable - for Hooking Router to power supply
Starlink Dish Antenna
Time to Mount Your Dish - Go to The Mounting System You Are Going To Use Below
Starlink Satellite Set Up - Installation - Dish Mounting - The Tripod Mounting Stand - ( Supplied in Box )
The Tripod Stand -- ( Included in Box ) For Mounting the Dish on Flat Surfaces
The Tripod is Light Weight Aluminum
There's a push button release to release the post to Click the Dish Into
Tripod does have screw holes in the legs for screwing Down - You need washers some sort of washer on top if you were going to use this to anchor you Starlink Dish ( NOT INCLUDED )
Tripod is Great Easy to Use And Simple to Set Up - Warning --> Needs to be fastened to a heavy surface to avoid being blown over by wind and security
Pros - Super fast set up and great for camping or taking into the back country
Starlink Satellite Set Up - Installation - Dish Mounting - Volcano Mount Installation ( Order Separately)
Startlink Valcano Mount - Unboxing and tools - Click Link to Order Now
What Is in the Volcano Roof Mounting System Box
6 x 1/2 Lag Bolts -
Rubberized compound tape - that's going to go in between this and the lag nuts and the mounts
Satellite Shoulder Bag - for carrying the dish onto the roof
Starlink Volcano Mounting Bracket - dimensions 6x9 inches 153x229 mm
Cable Fasteners - to secure the wire to the roof
Tools you will to Install Volcano Mount
A cordless drill - for drilling holes the the mounting bracket
3/8 drill bit - To drill through roof to secure mounting bracket
Stud Finder - To find the rafters to firmly secure the mounting bracket * will not work for metal roof
1/2 inch socket wrench - To screw the bracket to the roof
Ladder To get to the mounting location
Installing The Starlink Volcano Mount to your Roof
Picking the Location on the Roof with clear view of sky - Use the apps below to make sure you have clear unobstructed views
Starlink App from Google Play https://play.google.com/store/apps/details?id=com.starlink.mobile&hl=en_CA&gl=US
Starling App for Iphone https://apps.apple.com/ca/app/starlink/id1537177988
Use stud finder - locate rafter and mark roughly the center of rafter as this will be the where you line up the center holes of bracket
Place bracket with center holes of the bracket over center of the rafter use 3/8 drill bit to drill all 6 holes - Installation tip- Start a lag bolt 3 turns into the first hole you drill to help secure the bracket while I drill the rest of the holes )
Drill all 6 holes - Remove the bracket - clean area - and fill holes with rubber compound tape
- Read tip Below
Important Tip !! - Stick the long rubber tape to the bottom of mounting bracket instead of what is done in video then you can start a lag through the tape and find hole easier
Remove backing off of rubber tape - Use the 6 lag-bolts to secure the Volcano bracket to your roof
Install the Dish - Slide dish into mounting bracket - Align spring loaded button on dish with hole in Volcano mount - it will click into place and lock your dish to the mount
Next find best location to run the wires and secure with cable fasteners
YOUR READY TO HOOK UP DISH TO RECIEVER
Starlink Satellite Set Up - Installation - Dish Mounting - Ridgeline Mounting System- ( Order Separately)
Installing the Starlink Ridgeline Satellite Mount
As soon as you do that, your conversions dramatically decrease, and this is based on thousands and thousands of tests
- Picking the Location on the Roof with clear view of sky
Use The Starlink App to see the best location for your dish - Download Links below
Use the apps below to make sure you have clear unobstructed views
Starlink App from Google Play https://play.google.com/store/apps/details?id=com.starlink.mobile&hl=en_CA&gl=US
Starlink App for Iphone https://apps.apple.com/ca/app/starlink/id1537177988
Decide Location - Add the Mat under the Ridgeline Bracket - Place bracket on mat centered on the top ridge of your roof
Add your concrete blocks securely onto the Ridgeline mounting bracket - Minimum 80lbs weight is suggested
Slide your dish into the mounting bracket - Align the spring loaded pin with hole in bracket - It will click into place and lock the dish to the bracket
Now secure the dish cable with the cable fasteners provide to secure the cable out of the way so it wont be caught on anything snow ,branches , leave
Congratulation!! Your Dish is Installed
Starlink Satellite Set Up - Installation - Dish Mounting - Pole Mounting System- ( Order Separately)
Please Note Pole Mounting System is Only Designed to mount you dish onto of a pipes up to 2 1/2 inches
Tools Needed - Socket Wrench - Firmly Mounted Pole - max 2 1/2 inch Diameter
What's Included
- Pole Mounting Backet
- Installation Screws and Bolts
- 40 Cable Management Clips
To Install Pole Mount Bracket - Slide Bracket Over Pole - Tighten Screws Firmly - Slide Dish Into Pole Mounting Bracket
Align Spring Loaded Pin on Dish Post with Hole in Pole Mounting Bracket - until clicks and locks into place
Order Pole Mounting Bracket - https://shop.starlink.com/products
Starlink Satellite Set Up - Installation - Cable Installation - Cable Installation Kit - ( Order Separately)
Starlink Cable Routing Kit - Tools you will need and whats included in the Box - Click link to order now
Tools Needed
- Drill
- Stud Finder
- Phillips Screw Driver
** Knowledge of where Electrical Wiring is Running - in the wall you plan to drill
Included In the Cable Routing Kit
2 Drill Bits - 1 Spade Bit - 1 regular Bit
1 Cable Routing Tool
- Small tube Silicone
- 2 Cable Grommets
- Cable Fastening Wall Clips
- INSALLATION -
Find Locating in the house where the Startlink Router can plugin on exterior wall of house
Locate all Electrical Wiring - Plumbing - Gas lines - Where you plan to drill - ( Make sure when drilling you Do Not Hit Anything )
Follow instructions In Installation Guide - includes in the Starlink Cable Routing Kit
Installation Final Steps - Install the App and Plugin your Dish
Down load the Starlin App
Starlink App from Google Play https://play.google.com/store/apps/details?id=com.starlink.mobile&hl=en_CA&gl=US
Starlink App for Iphone https://apps.apple.com/ca/app/starlink/id1537177988
Click on Set Up
Set up wifi User name and password
Find new Starlink router in list of networks
Log out of Default Starlink Wifi Network and relog into your newly set up network
Allow a few minutes for your Starlink System find the satellites
you are all set - Now you need to change all your home equipment to be using your newly created Starlink Network
Please note** if does not connect to satellite after a few minutes you will need to check all your connectors into the power supply
Extore is a team of professionals who are passionate about creating extensions for web browsers. This devotion also gives us opportunity to appreciate work of other people. We get inspired by useful, open source extensions made by developers all over the world. Our strong belief is that one should share helpful add-ons with others. That’s why we’d like to present you our ever-growing list of favourite extensions that have inspired us. Moreover, as you probably have already learned, sometimes struggling for the best brings an end to the good. Talking about add-ons it often turns out that an upgrade is worse then previous version. Also it can become really tricky to get back to the beloved version of your favourite extension. That’s why we’re going to make not only the latest, but all versions of our favourite (and we hope yours too) add-ons available for download. No more compromises, just stick to the version you really like!
 Preparing download link, please wait for seconds
Almost done...
Click to download
Error getting file. Please try again
Preparing download link, please wait for seconds
Almost done...
Click to download
Error getting file. Please try again